August 6, 2026 • Carmen Reyes • 10 min reading time • Specs verified June 25, 2026
Fiberglass Laminating Rollers and Application Tools: The Overlooked Variable in Every Repair
You’ve just cut your mat, staged your cloth, and cracked open the resin — and somewhere in the back of your mind you’re already worried about bubbles. Air bubbles trapped under a fiberglass laminate (the layers of woven or chopped glass fabric bonded together with resin to form a rigid composite shell) are the most common cause of weak, cosmetically ruined repairs. Most owners blame the resin. Most of the time, the real culprit is the roller in their hand — or the mixing cup that started smoking halfway through the job. Fiberglass repair looks deceptively simple from the outside: wet the cloth, press it down, let it cure. But the tools you use to wet out, consolidate, and degas that cloth control the outcome more than any single product decision. This guide is for the practitioner who has already done a basic repair or two and is ready to stop leaving results to chance.
The Laminating Roller: Your Most Important Tool, Done Wrong by Almost Everyone
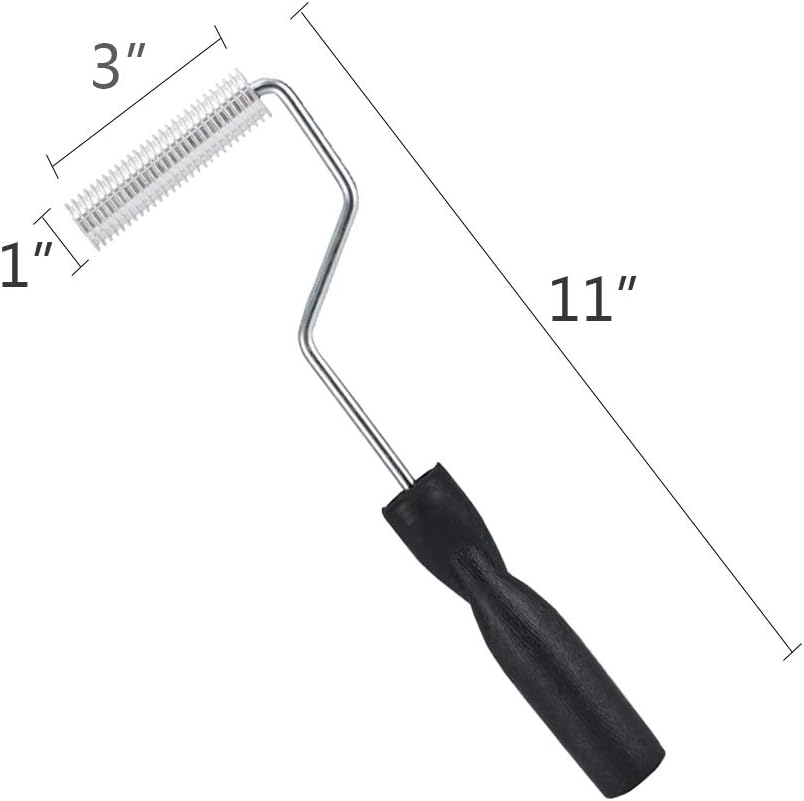
A laminating roller — also called a bubble roller, paddle roller, or consolidation roller — is a small cylindrical tool, typically 2 to 6 inches wide, used to press freshly wetted fiberglass cloth into a substrate and drive trapped air to the surface. There are two main types: aluminum bubble rollers with a segmented, disc-style surface, and plastic or foam paint rollers repurposed for wet layup.
Here’s the honest split on each:
Aluminum bubble rollers are the professional standard for good reason. The segmented metal discs create localized pressure that shears air bubbles upward without dragging the cloth out of position. Jamestown Distributors’ Boatbuilder Central laminating guide specifically recommends aluminum rollers for any repair thicker than a single layer of cloth, noting that foam rollers tend to absorb resin rather than drive it into the laminate. The tradeoff: aluminum rollers are genuinely annoying to clean, which is why — and this will be familiar to anyone who has read through aggregated buyer reviews — a meaningful number of practitioners just buy new ones each time rather than deal with cured resin in the disc gaps. That’s an honest admission, not a character flaw. The cleanup window is short and the consequence of missing it is a ruined tool.
Foam and chip brushes have a legitimate role in small repairs and tight corners where a rigid roller won’t fit. They wet out cloth adequately for single-layer patches. The problem is that foam compresses and rebounds, which means you’re applying pressure and releasing it in a way that can pull cloth fibers off-axis. For anything larger than a palm-sized patch, upgrade to aluminum.
The practical decision rule: If your repair is smaller than 6 inches square and involves a single layer of cloth, a chip brush or foam brush will get you through. For anything larger, multi-layer, or structural, use an aluminum bubble roller. Budget roughly $8–$15 for a quality roller that you’ll actually clean properly — or accept that it’s a consumable and buy in sets of three.
Roller Width and Working Time: Size the Tool to the Job
| Repair size | Recommended roller width | Why |
|---|---|---|
| Small void fill / patch under 6” | 1–2” aluminum or chip brush | Easier control, less resin displacement |
| Single-panel patch 6”–18” | 3–4” aluminum bubble roller | Covers efficiently within working time |
| Large multi-layer laminate | 4–6” aluminum bubble roller | Reduces pass count before gel |
Working time is the span after mixing when resin is fluid enough to manipulate — typically 20–45 minutes for standard marine epoxy at 70°F, shorter for polyester resin catalyzed with MEKP. Epoxyworks (published by Gougeon Brothers, makers of West System) notes that tool width should be chosen so you can complete consolidation across the full wetted area within the first half of working time. Running a narrow roller over a large panel eats that window fast.
Mixing Cups and the Exothermic Trap
This is where safety and technique intersect in a way that beginners — and even intermediate practitioners — get wrong at real cost.
Exothermic reaction: when epoxy resin and hardener combine, they generate heat as a byproduct of the chemical cure. In a thin, spread-out film over fiberglass, that heat dissipates harmlessly. In a concentrated mass sitting in a mixing cup, it builds. The TotalBoat 5:1 Epoxy Technical Data Sheet explicitly warns against leaving mixed epoxy in a cup — the confined mass accelerates cure, temperatures can exceed 200°F, and the resulting smoking, rapidly hardening mass can crack or melt plastic cups and produce noxious fumes.
Aggregated reviews of TotalBoat 5:1 Epoxy include at least one account of a practitioner melting three successive mixing cups by reusing cups that still had partially cured residue inside — the fresh mix accelerated against the old resin and created a smoking exothermic event before the new batch could be applied. This is not an isolated user error; it reflects a genuine workflow gap.
The fix is procedural:
- Use a fresh cup for every mix. Period.
- Use graduated mixing cups rated for chemical resistance — wax-free polyethylene (HDPE) cups, not standard plastic party cups. The Gougeon Brothers Epoxy System User Manual specifically recommends wax-free, graduated mixing cups because wax contamination from cheap cups can inhibit cure.
- Pour mixed resin out of the mixing cup and onto your work surface or into a roller tray within 2–3 minutes of mixing. Don’t let it sit.
- Never reuse a cup with cured or partially cured resin inside it.
For polyester resin with MEKP (methyl ethyl ketone peroxide, the liquid catalyst used to trigger cure in polyester systems), the same cup discipline applies — and the stakes on ratio accuracy are higher.
MEKP Ratios: Why This Specific Variable Can Ruin a Structural Repair
MEKP is not forgiving in the way epoxy hardener can be. With most epoxy systems, mixing slightly off-ratio (say, 5.1:1 instead of 5:1) produces a minor cure delay. With polyester resin and MEKP, the tolerance is tighter and the failure modes are more serious in both directions.
Too little MEKP: The laminate either stays tacky indefinitely or achieves a soft, under-cured surface that sands poorly and won’t bond properly to subsequent layers. Practical Sailor’s long-running epoxy and polyester product comparison notes that under-catalyzed polyester is one of the most common causes of failed repairs in DIY boatwork.
Too much MEKP: Accelerated, uncontrolled cure generates excess heat, can cause cracking or crazing in the laminate, and in quantity creates a genuine fire risk. Manufacturer technical data sheets typically specify 1–2% MEKP by weight, which for 10 ounces of resin means roughly 1.5–3 mL — a tiny volume that’s easy to eyeball incorrectly.
Use a calibrated syringe or graduated dropper. Do not pour from the bottle. Do not estimate.
Workflow Discipline: The Prep-Before-Mix Principle
Reviewers of several fast-setting marine repair products — including Brampton Marine Epoxy — consistently surface the same warning: when working time is 5–15 minutes, all preparation must happen before a single drop of resin is mixed. This is not a beginner tip. It’s a discipline that intermediate practitioners underestimate because longer working times on previous projects created a false sense of margin.
The Polymer World fiberglass kit review ecosystem reflects the same pattern: practitioners who measure and cut all their mat and cloth before mixing report dramatically fewer voids, misaligned layers, and rushed consolidation errors than those who cut while the clock is running.
Practical pre-mix checklist:
- All cloth and mat cut to final dimensions and staged in order of application
- Surface abraded, cleaned, and dried
- Mixing cups, rollers, and spreaders staged and within arm’s reach
- Gloves on, ventilation confirmed
- Catalyst or hardener measured but not yet combined
Mix only when you are ready to apply immediately.
Small Void Repairs: The Oral Syringe Technique
For pinhole voids, small delaminations, and fiberglass shower pan repairs — the kind of job where a full roller layup is excessive — a medical-style oral syringe loaded with catalyzed resin is a technique that aggregated owner reviews describe as significantly more precise than any tube or squeeze-bottle format.
The workflow: mix a small quantity of resin, draw it into the syringe, and inject it directly into the void before applying any surface patch. This backfills air pockets that a topical patch would simply bridge over, leaving an air gap beneath. The J-B Weld MarineWeld syringe format — a dual-chamber syringe that dispenses pre-metered two-part epoxy — is referenced in owner reviews specifically for this application, with one reviewer describing using it to fill a void in a fiberglass shower pan by injecting from the underside before finishing with a surface patch. The syringe format (whether product-integrated like MarineWeld’s dual syringe, or a standalone oral syringe used to draw mixed epoxy) consistently outperforms tube formats for controlled injection into confined spaces because you can control flow rate and direction. Tube formats work for surface application but lack the precision for true void injection.
Frequently Asked Questions
Can you clean and reuse fiberglass bubble rollers, or are they single-use? You can clean aluminum bubble rollers if you act immediately after use — before resin begins to gel (typically within 30 minutes of application at 70°F). Acetone or a dedicated epoxy solvent works if applied while resin is still liquid. The honest answer from aggregated practitioner reviews: most people don’t clean them in time, and the discs on aluminum rollers are particularly difficult to fully clear. Treat them as consumables unless you build the cleaning step into your workflow before resin gels.
What happens if you get the MEKP ratio wrong in polyester resin? Too little, and the laminate stays soft or tacky — sometimes permanently. Too much, and you risk cracking, excess heat, and in high volumes, fire. The safe operating range is narrow (typically 1–2% by weight). Use a graduated syringe, not a pour-from-bottle estimate.
How do you know if air bubbles are still trapped under a fiberglass laminate patch? Once cured, tap the surface gently with a coin or small hammer. A solid bond returns a clear, crisp knock. A delaminated void returns a dull thud — the same acoustic principle used in professional tap-testing. Epoxyworks describes this technique as a standard field method for identifying subsurface voids in cured laminates. Visually, bubbles sometimes show as slightly raised or cloudy areas against the surrounding surface.
Is the J-B Weld syringe format actually better than the tube format for fiberglass repairs? For void injection and pinhole fill, yes — syringe formats allow controlled, directed delivery that tubes cannot match. For surface bonding and gap fill where precision delivery isn’t the priority, tube formats are adequate and often faster to deploy. Match the format to the geometry of the repair.
What mixing cups can handle epoxy heat without melting? Wax-free graduated polyethylene (HDPE) cups are the standard recommendation — the Gougeon Brothers Epoxy System User Manual and most manufacturer TDS documents specify these explicitly. Avoid standard plastic party cups (often polystyrene, which can soften and contaminate the mix) and any cup with a wax coating. The more important discipline is to pour mixed resin out of the cup quickly rather than letting it mass-cure inside — that’s where the thermal runaway risk lives, not in the cup material alone.
The decision rule: If you’re buying materials for a fiberglass repair and you’re not specifically sourcing your application tools with the same care, you’re treating the most controllable variable in the job as an afterthought. Match roller width to panel size, use HDPE cups and throw them away after each mix, cut all your cloth before you open the hardener, and inject voids before you surface-patch them. The resin system is rarely the reason repairs fail.