August 21, 2026 • Carmen Reyes • 9 min reading time • Specs verified June 25, 2026
Fiberglass Repair From Cosmetic Gelcoat to Structural Lamination: Choosing the Right Kit
You’re looking at a gouge in your hull — maybe a dock rash scrape along the waterline, maybe a more serious crack near the keel stepped up by a hard grounding — and you’re wondering whether to grab a gelcoat repair kit at the West Marine counter or order a full lamination system. The word “fiberglass” covers an enormous range here. Gelcoat is the hard, pigmented outer skin you can see and touch; it’s cosmetic armor, not structure. Beneath it sits the actual fiberglass laminate — layers of woven or chopped glass fibers locked in a resin matrix — and that’s the load-bearing part of your hull. Repairing the outer cosmetic skin requires completely different materials and techniques than rebuilding those structural layers. Get the diagnosis wrong, and you’ll either waste money on an overkill repair or — worse — put a cosmetic patch over damage that’s still compromising your boat’s integrity. This guide helps you make that call, understand the chemistry behind each product tier, and match your wallet to the actual scope of work.
Reading the Damage First: Cosmetic vs. Structural
Before you open any kit, you need to know what layer you’re actually dealing with. Most boats built after the early 1970s follow the same basic construction sequence from outside in: gelcoat (roughly 0.5–0.8mm thick), then layers of fiberglass cloth or mat saturated in polyester or vinyl ester resin, sometimes with a foam or balsa core sandwiched in between for stiffness.
A cosmetic repair — the most common scenario — involves only the gelcoat and possibly the very first layer of underlying laminate. Signs: the damage is shallow, you can’t flex or deflect the hull skin around the damaged area, and there’s no crunchiness or give when you press firmly. Star cracks (spider-web stress fractures radiating outward) often look alarming but are frequently cosmetic if the underlying laminate is still rigid and intact.
A structural repair involves the laminate layers themselves. Signs include: the hull flexes or oil-cans in the damage zone, you can see exposed dry glass fibers (white, chalky strands), there’s delamination (the layers have separated — tap with a coin and listen for a dull thud vs. the crisp ring of a bonded surface), or the damage was caused by a significant impact or grounding. Any repair in a high-stress zone — keel attachment area, chainplate surrounds, bulkhead tabbing — should be treated as structural regardless of how it looks.
The BoatUS boating know-how library puts it plainly: if a crack passes through the full gelcoat thickness and shows any underlying laminate distortion, don’t treat it as cosmetic. Per Practical Sailor’s fiberglass repair coverage, misdiagnosing structural damage as cosmetic is one of the most consistent errors owner-refitters make, particularly on boats that have been bought and sold multiple times with cosmetic paint overlaying underlying problems.
The Chemistry Tradeoff: Polyester, Vinyl Ester, and Epoxy
This is where most intermediate refitters get tripped up. The three resin families behave differently, bond differently, and cost differently — and you can’t always swap them interchangeably.
Polyester resin is what most production fiberglass boats were originally built with. It’s cheap, easy to find, and cures reasonably fast. Gelcoat repair kits — the kind sold in the $15–$45 range — are almost always polyester-based. The catch: polyester shrinks slightly as it cures, it’s permeable to water over time, and it bonds poorly to cured epoxy. For a shallow cosmetic repair that will be covered with matching gelcoat, polyester is entirely appropriate.
Vinyl ester resin is a step up: better water resistance, less shrinkage, better fatigue resistance than polyester. It’s used in structural repairs where you’re building up laminate and want a moisture-resistant matrix — especially below the waterline. Many boatbuilding suppliers like Jamestown Distributors stock vinyl ester as a mid-tier structural option. Per Jamestown Distributors’ Boatbuilder Central composites section, vinyl ester is particularly well-suited for structural repairs in wet environments because of its lower water vapor permeability compared to standard polyester.
Epoxy resin — the kind in West System, MAS, or System Three kits — has the best adhesion to existing cured laminates, the best physical properties, and the best water resistance of the three. It doesn’t bond well under polyester gelcoat (adhesion incompatibility — the gelcoat won’t stick cleanly to cured epoxy), but for structural laminate repair, the Gougeon Brothers’ West System User Manual is explicit: epoxy offers superior adhesive strength to cured polyester or vinyl ester laminates, making it the preferred choice for structural rebuilds, tabbing, and keel-area reinforcement.
The practical rule: Cosmetic repair → polyester gelcoat system. Structural repair that will be covered with paint (not gelcoat) → epoxy laminating system. Structural repair below the waterline → epoxy or vinyl ester. Don’t put epoxy under gelcoat. Don’t use polyester for structural lamination work if you can avoid it.
Kit Tiers and What You Actually Get
By the Numbers
| Repair type | Typical kit format | Price range (2026) | Resin base |
|---|---|---|---|
| Cosmetic gelcoat scratch/gouge | Gelcoat repair kit (tube or kit) | $15–$50 | Polyester |
| Moderate cosmetic + shallow laminate | Fiberglass repair kit (mat + resin) | $30–$80 | Polyester |
| Structural laminate rebuild | Epoxy laminating system (quart–gallon kit) | $80–$220+ | Epoxy |
| Below-waterline blister/structural | Vinyl ester or epoxy system | $60–$200+ | Vinyl ester / Epoxy |
Tier 1: Gelcoat Repair Kits ($15–$60)
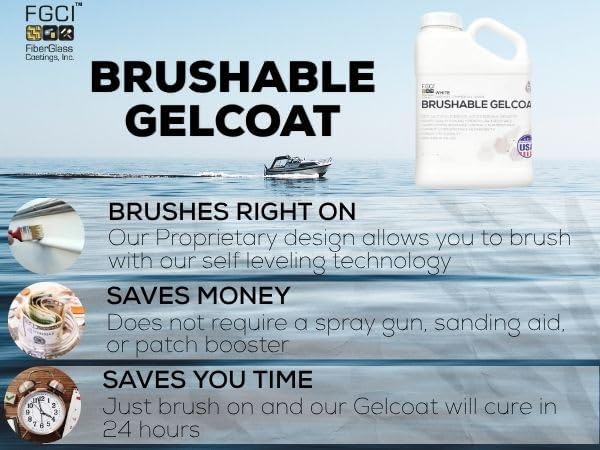
These are the right tool for the right job when the damage is genuinely superficial. Products like Bondo Fiberglass Resin and Interlux Watertite occupy this tier for very minor patching, while purpose-built gelcoat repair kits — TotalBoat’s gelcoat paste, BoatLIFE gelcoat repair kits, or 3M’s Marine Gelcoat Restorer — are designed specifically for matching, filling, and polishing out cosmetic damage.
The persistent challenge at this tier is color matching. Gelcoat yellows and fades with UV exposure, and even a manufacturer-matched gelcoat color will look different on a boat that’s been in the sun for ten years. Owners across forum consensus on sites like Boatbuilder Central note that mixing in small amounts of universal tint and doing multiple test patches in an inconspicuous area is essentially mandatory — there’s no kit that eliminates this problem, regardless of price. The real skill at this tier is patience with the color-matching process, proper surface prep (80-grit scuff, acetone wipe), and allowing full cure before sanding back to fair with progressively finer grits.
One flag: some kits marketed as “fiberglass repair” at this price point contain only a small amount of chopped strand mat and polyester resin — they look like structural repair kits but are formulated and proportioned for shallow fills only. Read the product’s technical data sheet before assuming.
Tier 2: Polyester Laminating Systems ($30–$120)
When the damage has penetrated the gelcoat into the first one or two laminate layers but the hull is still rigid, you need to physically rebuild those glass layers before fairing and re-gelcoating. At this tier you’re typically working with rolls of fiberglass cloth (woven) or mat (random chopped fibers), mixed with polyester laminating resin.
Key spec to check on the TDS (Technical Data Sheet — the manufacturer’s published document listing resin properties, mix ratios, cure times, and working temperatures): whether the resin is “air-inhibited” or “non-air-inhibited.” Air-inhibited polyester resins stay tacky at the surface until they’re top-coated or exposed to MEKP-induced through-cure — which is actually desirable for intermediate laminate layers because the tacky surface promotes bonding between layers. Finishing/surface resins have wax added to exclude air and allow a fully dry surface for sanding. You typically want laminating (air-inhibited) resin for all layers except the final one.
Epoxyworks — the technical publication from Gougeon Brothers — notes that interlaminar bonding with polyester is strongly temperature-dependent; working in ambient temperatures below 60°F dramatically slows cure and weakens finished bond strength.
Tier 3: Epoxy Laminating Systems ($80–$400+)
This is the structural repair tier and it starts with West System’s 105/206 or 105/207 systems, moves through MAS Low Viscosity Epoxy and System Three Silvertip, and extends up to professional-grade Gougeon 655 or SP High Build systems for major structural rebuilds.
What you’re paying for: adhesion to existing cured laminates that polyester can’t match, dimensional stability, and near-zero water vapor transmission in cured laminates. The Gougeon Brothers’ User Manual quantifies this: properly prepared and laminated epoxy repairs achieve cohesive failure in the parent laminate (meaning the glass breaks before the bond), which is the performance benchmark for structural repairs.
For hull repair, most practitioners use biaxial fiberglass cloth (±45° fiber orientation) rather than woven roving for patches — biax conforms better to compound curves and provides more uniform strength in multiple load directions. Jamestown Distributors’ Boatbuilder Central section consistently recommends biaxial or triaxial cloth for structural patching over plain woven cloth.
Working with epoxy requires attention to mix ratio discipline (a gram scale, not a volume measure, for professional-grade systems), pot life management, and amine blush removal between cure cycles. Amine blush — a waxy surface film that forms on curing epoxy in humid conditions — must be washed off with water and an abrasive pad before adding the next layer, or subsequent coats won’t bond. Many owner refitters skip this step; it shows up later as delamination at the repair boundary.
The Decision Rule
If you’re standing in front of a damaged hull right now, here’s the framework:
If the hull is rigid and the damage doesn’t penetrate past the gelcoat, then a gelcoat repair kit ($15–$50) is the right answer. Spend your extra effort on color matching, not materials.
If you can see exposed glass fibers but the laminate is rigid and intact, then use a polyester laminating system for the structural fill and match gelcoat over the top. A $40–$80 kit handles most repairs in this category.
If the hull flexes around the damage, you hear a dull thud when you tap around the perimeter, or the damage is in a high-stress zone (keel, chainplate, bulkhead tabbing), then stop, fully map the delamination zone with a tap test, and commit to an epoxy laminating repair. Budget $80–$200+ in materials for a localized structural patch; more for an extensive delamination repair. Don’t gelcoat over this tier of damage — cover with two-part polyurethane or epoxy primer instead.
If the repair is below the waterline and will be in sustained water contact, then use epoxy or vinyl ester regardless of depth — water permeability of standard polyester makes it a poor long-term choice in immersed conditions.
The materials cost between getting this right and getting it wrong is often $50–$150. The labor cost of redoing a failed cosmetic patch over unaddressed structural damage is measured in seasons, not dollars. Per Practical Sailor’s fiberglass repair analysis, the most expensive repairs are almost always ones where the first repair was underspecified for the actual damage depth. Buy the right kit for what’s actually there — not what you’re hoping it is.